Want to brighten up a dreary room or a cold gray day? Try one of these easy spring projects! Project #1: Cheery spring table runner.
I wanted something bright and colorful to pick up the dark tones of my dining table, so I pulled out my scraps and found a perfect length of fabric I'd used for some curtains and some lining that was just the right size. For a table runner, all the have to do is decide how wide you'd like the finished product to be and add about an inch to either side for seams. I laid out my cut fabric on the floor and squared it off (both the design and the liner). Then I folded the long sides about an inch and pressed them. I folded an inch again and pressed the sides, then took the whole thing to my sewing machine and sewed a seam down either side (this includes the liner, which gets tucked into the folds as you make them).
Then I folded each end like a Christmas present- fold the fabric up about an inch, tuck in the corners and pin. I topstitched both ends and that was it! Now I have a beautiful table runner to spruce up my table.
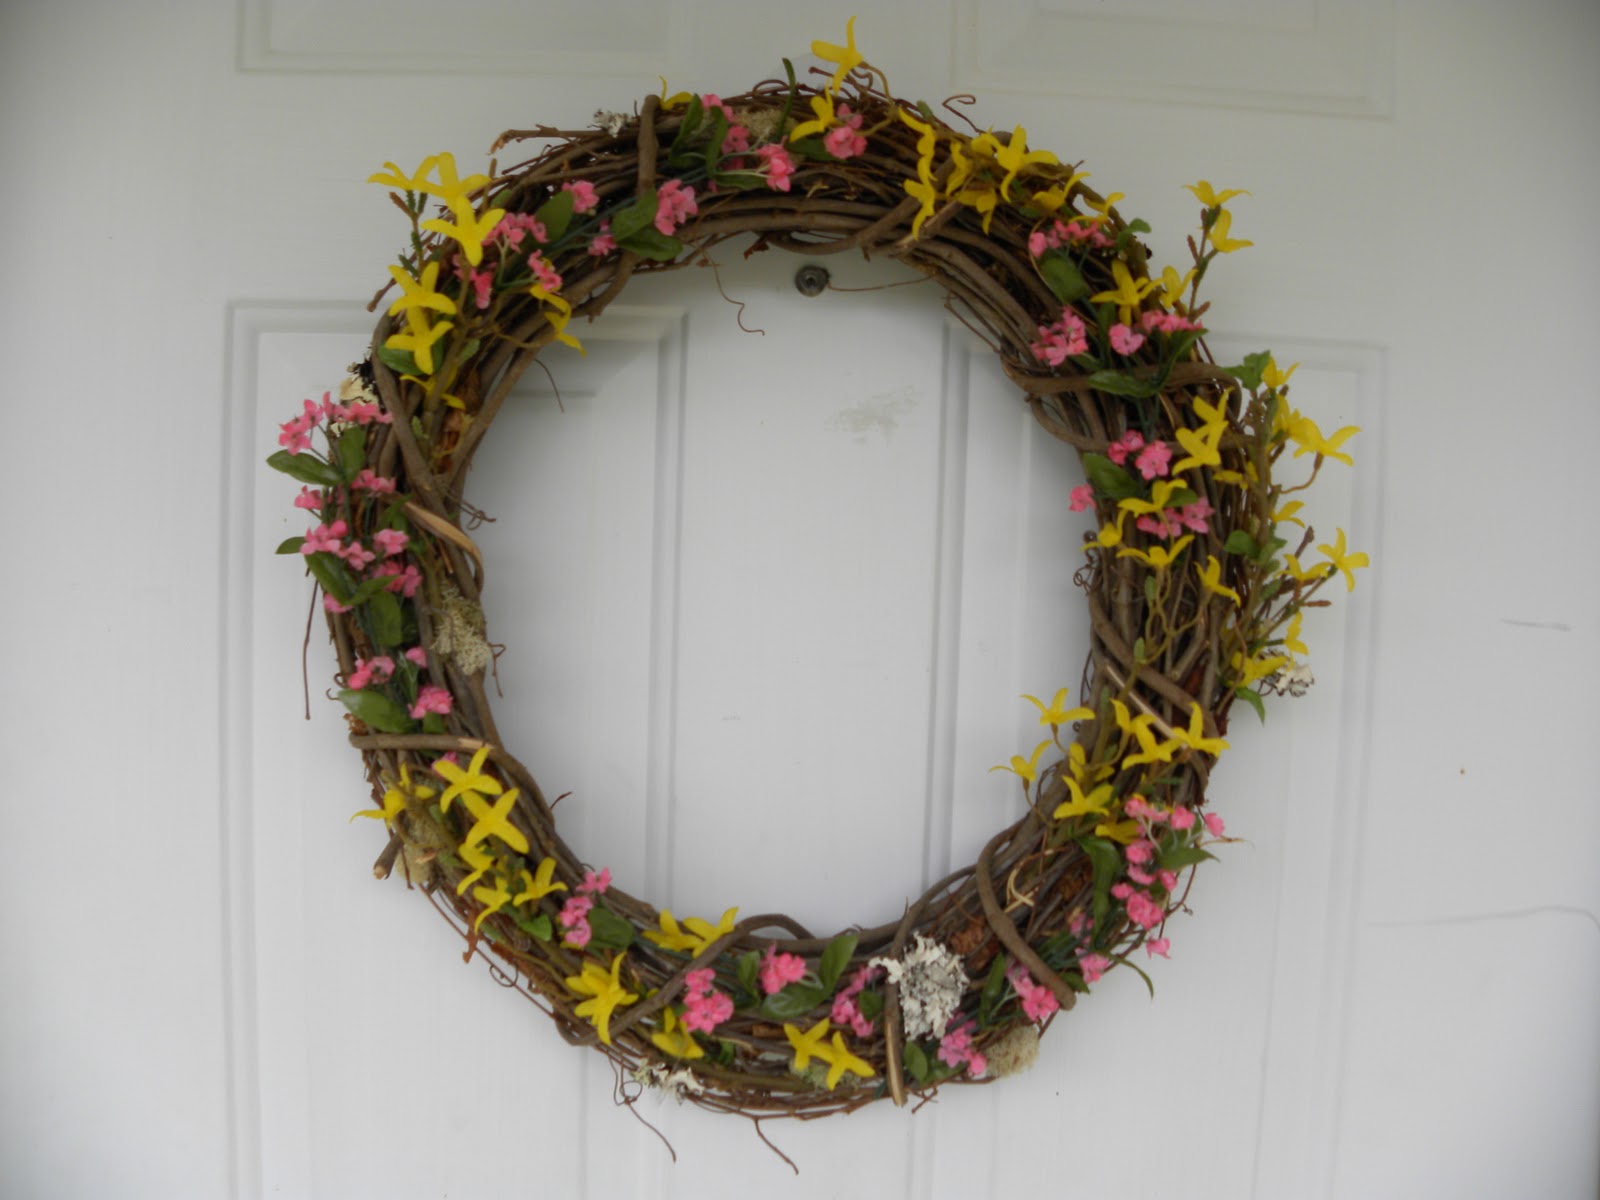
Spring project #2: Easy door wreath. I have a grapevine wreath hanging on my door that's been there for a few months. It was dull, drab, and hadn't been updated since last Easter. If your door is magnetic, you can look for a magnetic wreath hanger. I found mine at Wal-Mart. It's super heavy-duty and will hold up to strong winds. You can find grapevine wreaths at any crafting store. I also bought some fake forsythia and fake pink flowers to complete this wreath.
I previously used dried flowers on this wreath, but after exposure to the elements for a few months, they turned brown, so I took them off. The only elements that I liked that remained were some lichens and moss. I superglued those onto the wreath. I do prefer realistic-looking fake flowers if possible. Using my wire cutters, I clipped apart the floral stems and began to insert them into the wreath, alternating pink and yellow. Be sure to really anchor the stems well- you don't want them to fall out. And that's it! Feel free to add artistic touches such as a nest or robin's eggs for a little more nature feel.
Showing posts with label table runner. Show all posts
Wednesday, April 6, 2011
Tuesday, January 11, 2011
Simple, Cheap & Easy Coasters!
I found this post on The Cottage Home and thought "I can do that!". I picked up this fabric from Ikea in July and made myself a table runner for our kitchen. This was before my blogging days, so no before and after pictures of how I made it.
Anyway, shortly after I realized that when hubby and I eat at the kitchen table I FEAR water stains on the kitchen table. We had an old table from our college days and last year a guest of ours left a coffee mug on the chair and left a stain <sigh>. So we've been using the table runner to set our drinks down. Only the hubby FEARS staining my beautiful runner.
So after seeing the post online and several others, I realized I had almost all of the material in the house. The builder left us extra bath tile (which was white). I opted to use fabric instead of scrapbook paper. Fabric + Mod Podge = LOVE. I had extra fabric from the table runner and I had a ton of felt. So I purchased Mod Podge (I can't believe I didn't own any until yesterday) and some acrylic spray. Here are my pictures from the process.
First I cut out the squares of my fabric to be just smaller than the tile square. I also cut out the felt to be the same size as the tiles.
The I used the Mod Podge, put one layer of sticky on the tile and put the fabric on top. Be sure to smooth out the fabric so there are no bubbles!! Now, sit back and wait 15-20 minutes.
Apply another coat of Mod Podge on top of the fabric & let dry. I put 3 coats of Mod Podge on. Good thing I was busy doing other house stuff with all the waiting.
Once dry, flip the coasters over and spray both the back of the coaster & one side of the felt with adhesive spray. I love adhesive spray.
This should be done outside or somewhere with good air flow. I was bad and the house stinks. You should wait 2 minutes between when you spray and when you put the pieces together. Be sure to follow the instructions with the spray.
I had to trim the edges with my scissors since I'm not a good at making perfect squares. I tried trimming using an exacto knife but the felt bunched and looked bad. Then, grab your trusty acrylic spray and spray those buggers down (this should also be done outside). The acrylic spray helps protect and waterproof them.
Ta Da! The finished product
Doesn't it make you want to try to make some? Tiles are less than a quarter at home improvement centers if you don't have any handy. These cost me less than a few dollars for the whole stack and no more worrying about staining the table or the runner.
Anyway, shortly after I realized that when hubby and I eat at the kitchen table I FEAR water stains on the kitchen table. We had an old table from our college days and last year a guest of ours left a coffee mug on the chair and left a stain <sigh>. So we've been using the table runner to set our drinks down. Only the hubby FEARS staining my beautiful runner.
So after seeing the post online and several others, I realized I had almost all of the material in the house. The builder left us extra bath tile (which was white). I opted to use fabric instead of scrapbook paper. Fabric + Mod Podge = LOVE. I had extra fabric from the table runner and I had a ton of felt. So I purchased Mod Podge (I can't believe I didn't own any until yesterday) and some acrylic spray. Here are my pictures from the process.
First I cut out the squares of my fabric to be just smaller than the tile square. I also cut out the felt to be the same size as the tiles.
The I used the Mod Podge, put one layer of sticky on the tile and put the fabric on top. Be sure to smooth out the fabric so there are no bubbles!! Now, sit back and wait 15-20 minutes.
Apply another coat of Mod Podge on top of the fabric & let dry. I put 3 coats of Mod Podge on. Good thing I was busy doing other house stuff with all the waiting.
Once dry, flip the coasters over and spray both the back of the coaster & one side of the felt with adhesive spray. I love adhesive spray.
This should be done outside or somewhere with good air flow. I was bad and the house stinks. You should wait 2 minutes between when you spray and when you put the pieces together. Be sure to follow the instructions with the spray.
I had to trim the edges with my scissors since I'm not a good at making perfect squares. I tried trimming using an exacto knife but the felt bunched and looked bad. Then, grab your trusty acrylic spray and spray those buggers down (this should also be done outside). The acrylic spray helps protect and waterproof them.
Ta Da! The finished product
Doesn't it make you want to try to make some? Tiles are less than a quarter at home improvement centers if you don't have any handy. These cost me less than a few dollars for the whole stack and no more worrying about staining the table or the runner.
Labels:
acrylic spray,
coaters,
fabric,
mod podge,
spray adhesive,
table runner,
tiles
Subscribe to:
Posts (Atom)


