My husband brews beer. He just finished his third batch, and he is loving it. But, he keeps spilling beer on our oven mitts. Sewing machine to the rescue!!!
 |
| The boys brewing beer. With the kitchen mitts. The one in the flannel is mine (boy, not mitt). |
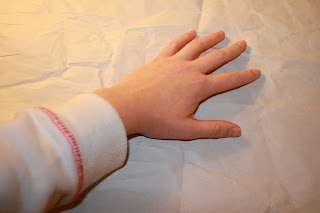
First step: Make the Pattern. This one is easy. Trace a mitten pattern around your hand.
Then, draw around it in the shape of an oven mitt, remembering to leave room for seam allowances and the bulk of your batting/insul-bright. I used a pre-quilted cotton blend for one side of the mitt, and some regular cotton print for the other side. I also cut a smaller version of the mitt in insul-bright. Remember; cut two of each fabric.
I then sewed the quilted fabric and the cotton, right sides together. I sewed up one side of the mitt, around and down the other side. I left the bottom open. This is very important. If you sew all the way around, you won't be able to turn it right-side out, and basically you will have a craft fail.
Here's where I started spacing out on taking pictures, but I will try to explain. So I turned both right-side out and ironed the seams out. But then, I turned the cotton fabric back wrong side out and stuffed it inside the quilted mitt, so that there would be a mitt inside the mitt, with the wrong sides facing each other. then, on each side of the mitt, slide in your insul-bright! And the bottom of your mitt will look like this:
Of course, you do not want your finished product looking like this. So what do you do? You grab my favorite thing: bias tape! Wrap it around the bottom, topstitch, and voila! You are done. This project took half an hour, tops, and is a wonderful solution for the beer-soaked potholder situation.


No comments:
Post a Comment